Easy methods to DIY Nail Polish in 4 Easy Steps
Simply once we thought we might tried each DIY underneath the solar, alongside got here DIY nail polish. Yep, you learn that accurately. Seems, you possibly can simply create your dream lacquer with a bit of little bit of clear nail polish and eyeshadow. I personally have dozens of eyeshadow palettes with pans of shades I will by no means use for my lids, and all the time puzzled if there was a manner to make use of these pigments (I hate waste). Fortunately for us, diy nail polish is definitely fairly straightforward to make, so whether or not you are a seasoned magnificence DIY-er or simply searching for one thing new to attempt, look no additional than this step-by-step DIY nail polish tutorial.
Here is What You may Want:
- Eyeshadow
- Clear Nail Polish (Base Coat or Prime Coat)
- Cuticle Pusher
- Paper Funnel (optionally available)
Pour Out A few of the Clear Polish
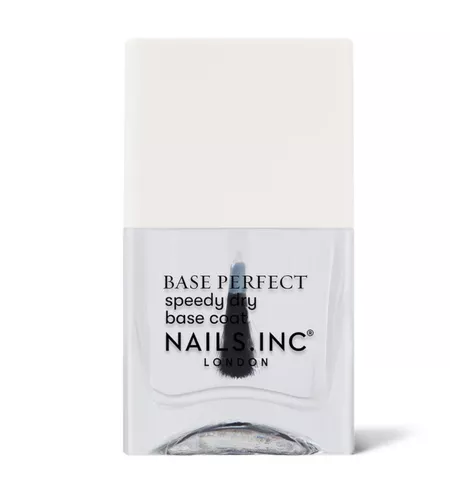
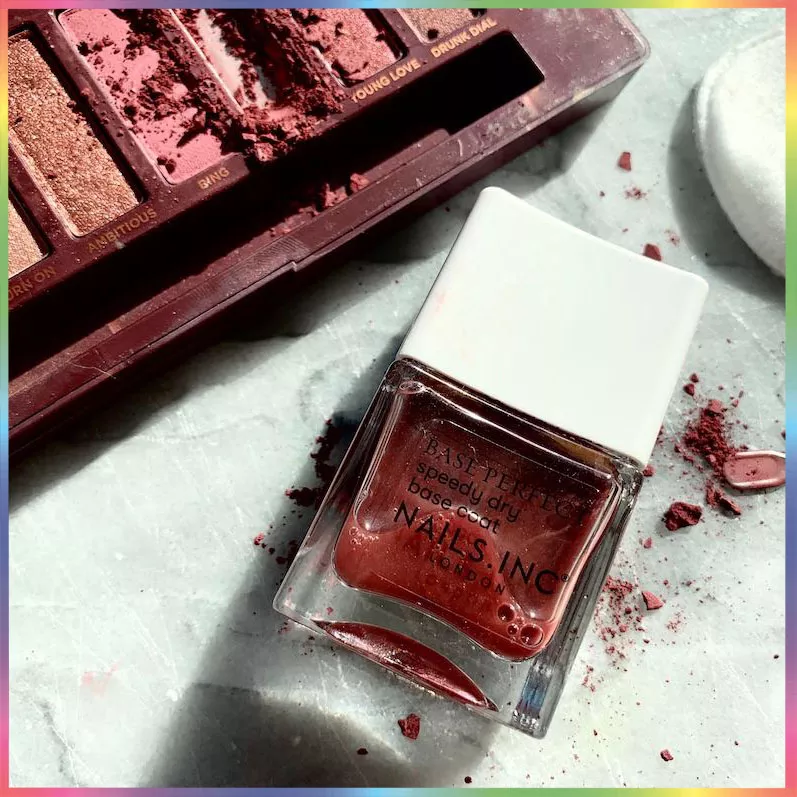
In case you’re working with a model new bottle of clear nail polish, you will wish to begin by pouring out about 1/6 of the polish to make some room for including the eyeshadow later. In case you’ve used your clear polish a couple of instances and have some room on the high, then there isn’t any have to carry out this step. We suggest utilizing a components like NAILSINC Nail Pure Base Coat. The components is available in a transparent bottle, so it is easy to see how the colour is popping out as you add the eyeshadow within the subsequent few steps.
Crush Up Some Eyeshadow
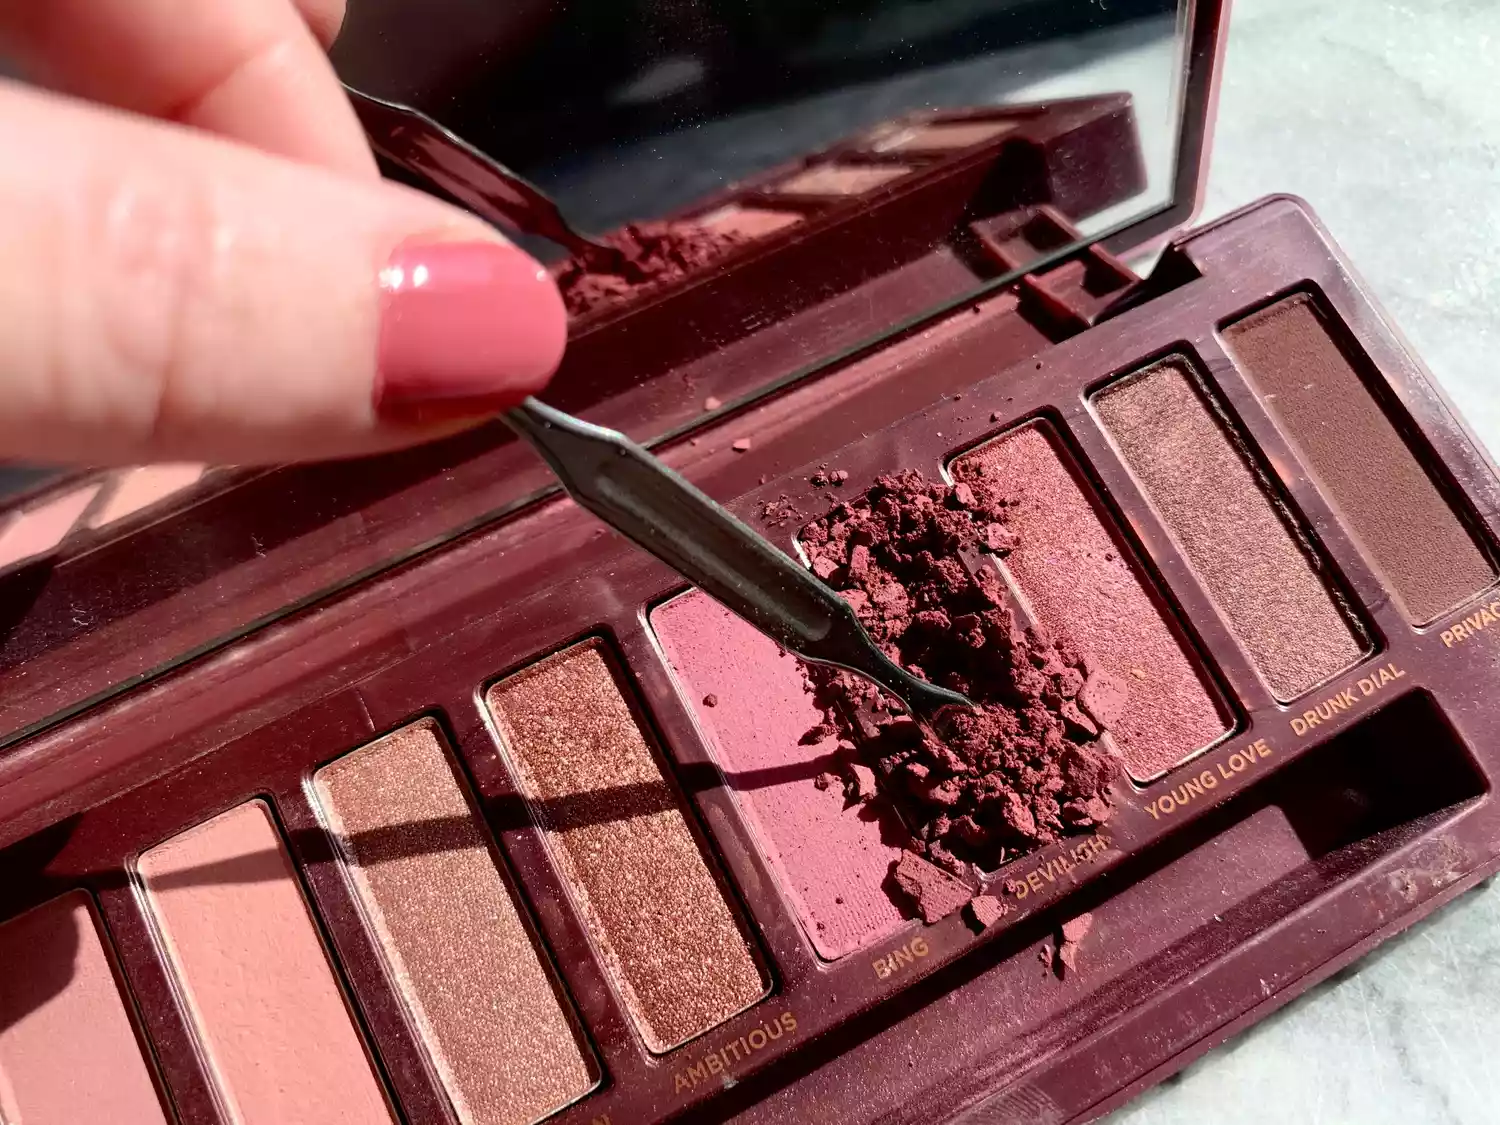
As soon as you have recognized the eyeshadow shade you’d prefer to repurpose into eyeshadow, we suggest utilizing a cuticle pusher to softly crush the powder. Pressed eyeshadows will come aside pretty simply, so there isn’t any want to make use of extreme power (just a bit little bit of strain). Crush up the eyeshadow till it varieties a fantastic powder, eliminating any giant clumps. I am utilizing shade Devilish from the City Decay Bare Cherry Palette ($44). It is a shade that I have never touched for my lids, so I really like that I am respiratory new life into it by changing it into nail lacquer.
Pour the Crushed Eyeshadow Powder into Your Clear Nail Polish
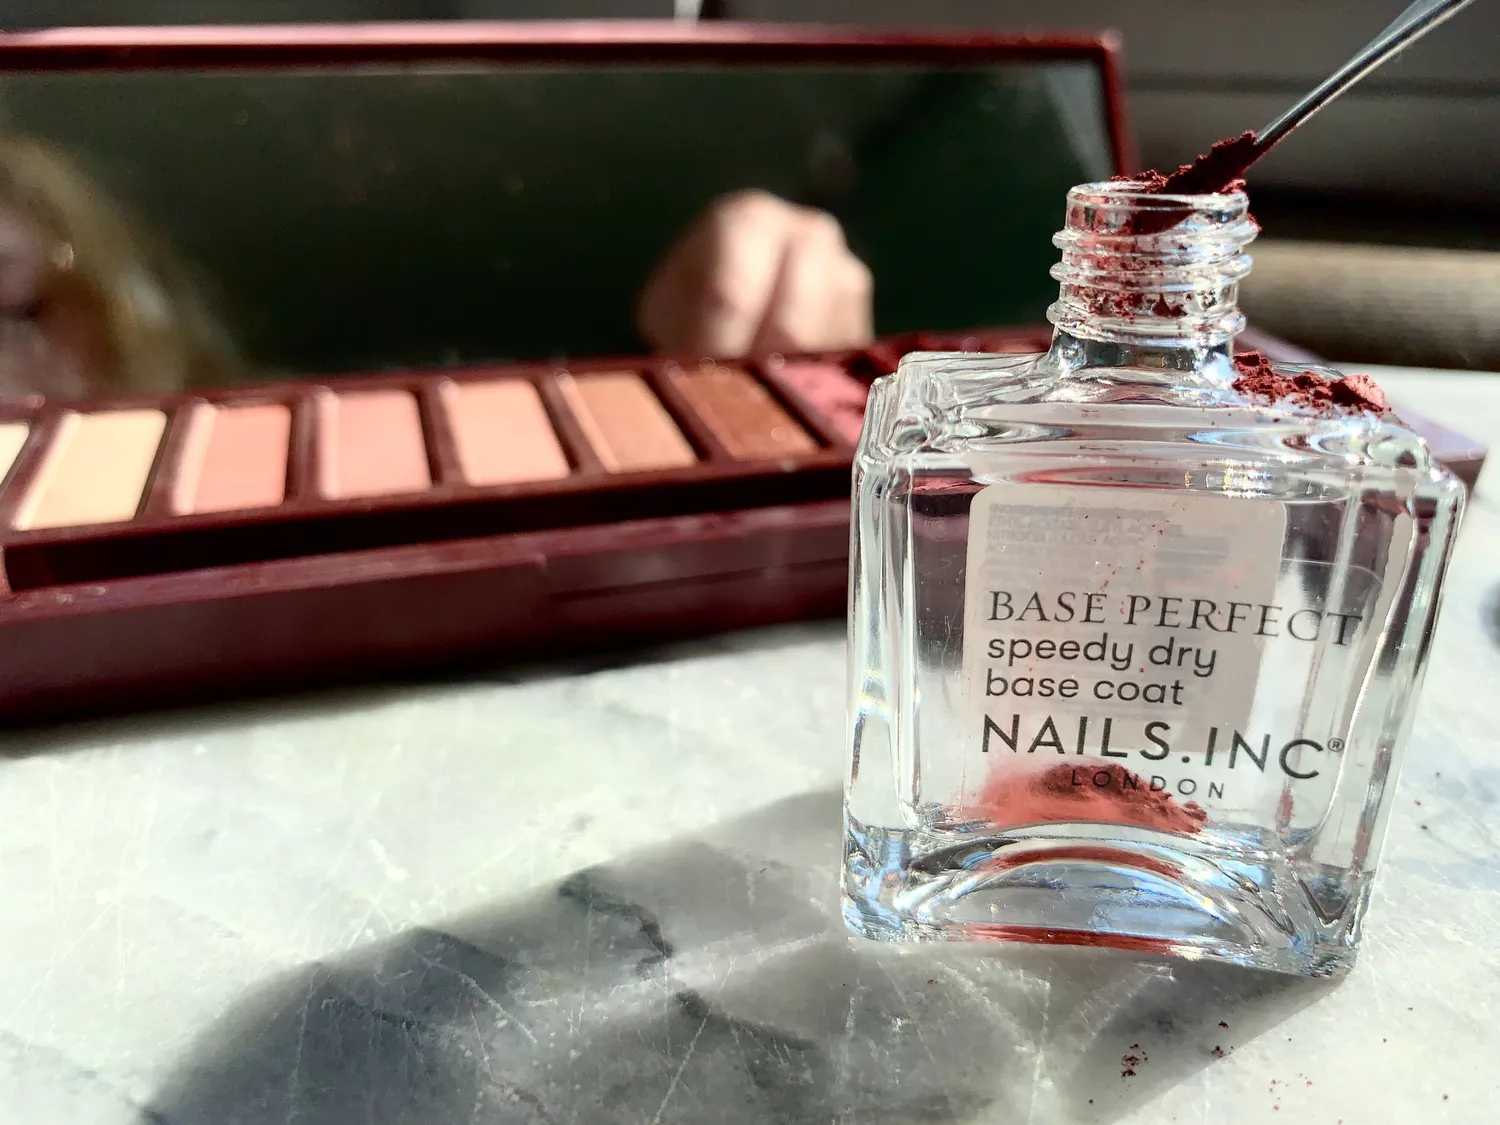
As soon as your eyeshadow is crushed to a fantastic powder, you should use the identical cuticle pusher from the first step as a mini shovel to scoop the powder into the nail polish. I discovered it pretty straightforward to get the powder into the clear polish with minimal spillage, however you can even make a mini paper funnel utilizing a sticky notice for those who’re anxious about making a multitude. Regardless, work on high of a chopping board or paper towel, as a result of a bit of spilling is inevitable.
The quantity of eyeshadow you add to your polish is totally as much as you. The extra powder you add, the extra opaque your DIY components can be. I added the complete pan of eyeshadow as seen right here, which created an opaque polish. For extra sheer shade, add about half the pan.
Utilizing base or high coat with a transparent container will assist construct your approach to your best nail polish opacity. As you add a bit of little bit of powder, do a fast shake of the bottle to see for those who’ve reached your required hue.
Shake the Bottle to Combine

As you add powder to your clear polish, you will discover that it settles on the backside of the jar. As soon as you have added your required quantity of eyeshadow powder, screw the cap on tightly, then shake it up. Your components ought to combine in simply a few seconds. Et voila! You formally have your very personal DIY nail polish. If the colour is extra sheer than you anticipated, merely add a couple of extra scoops of the eyeshadow.
Whatever the quantity of pigment you added to your polish, this components ought to really feel much less goopy than common nail polish, which implies it is barely harder to manage (it spreads sooner throughout your nails as you paint than conventional nail polish). I ended up getting this DIY components on the pores and skin surrounding my nail, however I simply used a small clean-up brush dipped in nail polish remover to wash it up. Aside from that, it actually seems to be and appears like store-bought nail polish. Simply keep in mind to shake your bottle earlier than every use. Take pleasure in!